

A kitchen renovation can make your home more functional, comfortable, and attractive. It can also become stressful when decisions are made in the wrong order. Choosing beautiful countertops before confirming cabinet dimensions, for example, may create avoidable problems later.
The best approach is to start with your needs, budget, and existing space. Then plan the layout, select materials, arrange professional work, and prepare for construction. This process helps you make informed decisions before committing to expensive purchases.
Whether you want a simple refresh or a complete kitchen transformation, this guide explains how to plan a kitchen renovation from the first idea to the final inspection.
Kitchen Renovation Planning: Where to Start
A kitchen renovation is the process of improving a kitchen’s layout, appearance, storage, fixtures, or functionality. It can range from updating cabinets and countertops to a full remodel involving appliances, plumbing, electrical systems, or structural changes.
Before choosing colors or browsing products, identify what is not working in your current kitchen. Your renovation should solve practical problems as well as improve the room’s appearance.
1. Identify Your Kitchen’s Main Problems
Spend a few days observing how you use your kitchen. Notice where you lose time, where clutter collects, and which features cause frustration.
Ask yourself:
- Is there enough countertop space for meal preparation?
- Do you have sufficient storage for cookware, dishes, and food?
- Can more than one person work comfortably in the kitchen?
- Is the lighting suitable for cooking and cleaning?
- Are appliances outdated, inefficient, or difficult to use?
- Are cabinets, flooring, or countertops damaged?
- Does the current layout create unnecessary movement?
Write down your answers and rank the problems by importance. For example, adding drawers for cookware may be more useful than installing decorative open shelves if storage is your biggest concern.
2. Decide Between a Cosmetic Update and a Full Renovation
Not every kitchen needs a complete remodel. The right scope depends on the condition of existing components, your budget, and the problems you want to solve.
| Renovation option | Best for | Main benefit | Limitation |
| Cosmetic update | A functional kitchen that looks dated | Refreshes the room with less disruption | Does not solve major layout problems |
| Cabinet refacing | Sound cabinet boxes and a suitable layout | Updates cabinet appearance without replacing every box | Does not create a new layout |
| Partial renovation | Kitchens needing selected upgrades | Focuses spending on priority areas | Existing features may restrict design choices |
| Full renovation | Kitchens needing major functional or layout changes | Allows a coordinated redesign | Usually requires more planning, spending, and disruption |
A cosmetic update might involve paint, hardware, lighting, or a backsplash. A partial renovation could replace countertops and appliances while keeping existing cabinets.
A full renovation may involve new cabinetry, flooring, electrical work, plumbing changes, or structural modifications. These projects require more coordination and may need permits.
Practical tip: Fix functional problems before spending heavily on decorative finishes. A kitchen that looks attractive but lacks storage or usable workspace may not meet your needs.
3. Measure the Existing Kitchen
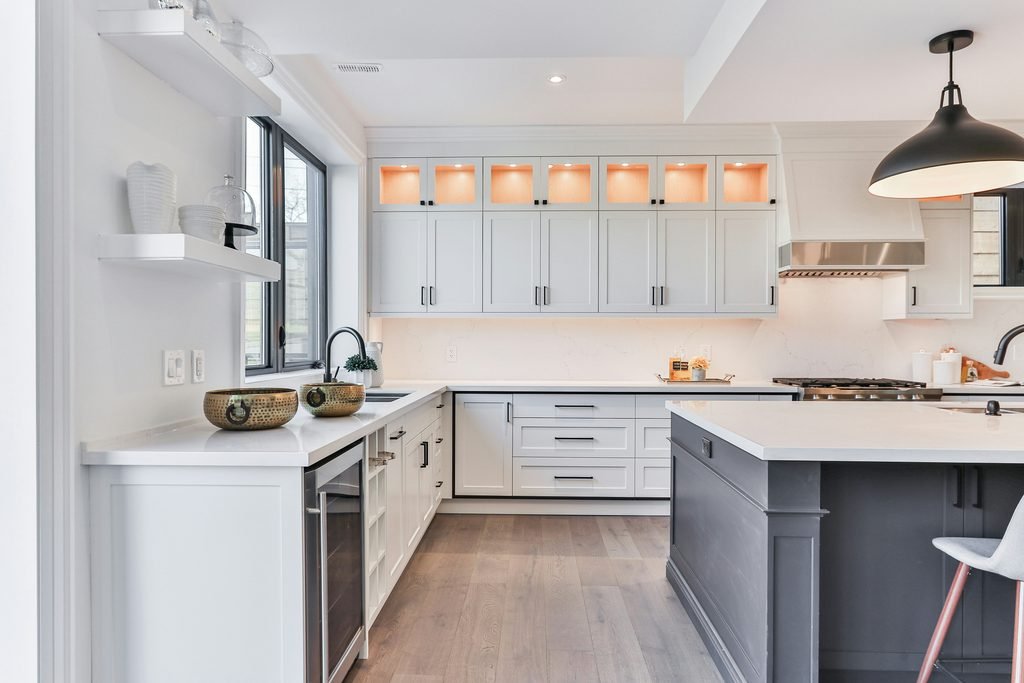
Accurate measurements are essential before you finalize a layout or order products. Measure the room’s length and width, ceiling height, doors, windows, and the location of existing plumbing and electrical connections.
Record the positions of:
- Doors, windows, and their opening directions
- Existing cabinets and countertops
- Refrigerator, range, cooktop, and dishwasher
- Sink, plumbing connections, and ventilation
- Electrical outlets, switches, and light fixtures
- Vents, radiators, and other fixed features
Also measure hallways, doorways, and stairs that delivery teams may use to bring cabinets or appliances into the home.
Treat your first measurements as a planning reference, not final installation dimensions. Have the responsible designer, cabinet supplier, or contractor verify measurements before orders are placed.
4. Plan the Kitchen Layout Around Daily Tasks
A good layout supports the way your household cooks, cleans, stores food, and moves through the room. Consider the relationship between the refrigerator, sink, preparation area, and cooking surface.
The traditional kitchen work triangle is one planning concept, but it is not a universal solution for every home. Larger kitchens, open-plan spaces, and kitchens used by several people may need different arrangements.
Common layouts include:
- One-wall kitchen: Places cabinets and appliances along a single wall. It can suit compact apartments and open-plan homes.
- Galley kitchen: Uses two parallel runs of cabinets. It can offer efficient storage and preparation space when the walkway is planned well.
- L-shaped kitchen: Uses two adjoining walls and can leave room for a dining area or island, depending on the space.
- U-shaped kitchen: Uses three sides for cabinets and work surfaces. It can provide substantial storage but needs careful planning to avoid a cramped feeling.
- Island kitchen: Adds a central work surface or seating area when enough clearance is available.
Use the National Kitchen & Bath Association’s Kitchen Planning Guidelines as a professional reference when evaluating layout, circulation, and usability. Check the actual dimensions and applicable requirements for your project rather than assuming one layout rule fits every home.
Kitchen Renovation Costs and Budget Planning
Kitchen renovation costs depend on the room’s size and condition, material choices, local labor rates, and the amount of plumbing, electrical, or structural work involved. There is no single price that accurately describes every kitchen renovation.
Instead of relying on a universal average, build a project budget around your specific plans and local estimates.
1. Break the Budget Into Categories
Create a list of expected expenses before requesting final quotes. Common categories include:
- Design, planning, and measurement services
- Cabinets, drawers, and hardware
- Countertops and backsplash
- Flooring and underlayment
- Appliances and ventilation
- Sinks, faucets, and plumbing work
- Lighting, outlets, and electrical work
- Painting, trim, and finishing
- Demolition, debris removal, and disposal
- Permits, inspections, and professional fees
- Temporary cooking arrangements and other living expenses
Include delivery, installation, and any additional work required to make products fit. A low product price may not represent the full installed cost.
Ask contractors to separate labor, materials, allowances, and exclusions in their written estimates. This makes it easier to compare proposals that cover the same work.
2. Set a Contingency Allowance
Renovation work can reveal problems that were not visible before demolition. Examples include water damage, deteriorated subflooring, outdated wiring, or plumbing that needs attention.
Set aside a contingency amount based on the property’s condition, project complexity, and advice from your contractor. Do not treat this reserve as money available for optional upgrades.
If you are working with a strict budget, prioritize essential repairs and functional improvements first. You can often postpone decorative features that do not affect safety or daily use.
3. Decide Where to Spend and Where to Save
Spend according to your priorities rather than assuming the most expensive product is always the best.
Areas worth careful investment may include:
- Durable cabinet construction and useful storage fittings
- Proper installation of countertops and flooring
- Task lighting over preparation and cooking areas
- Suitable ventilation for cooking
- Reliable appliances that match your needs
- Qualified electrical and plumbing work
Potential areas to save include:
- Keeping a functional layout rather than moving plumbing unnecessarily
- Refacing sound cabinets instead of replacing them
- Choosing a simpler backsplash pattern
- Reusing suitable appliances after checking their condition and dimensions
- Updating cabinet hardware instead of replacing every cabinet
Compare the long-term maintenance requirements of materials as well as their purchase prices. A cheaper surface may require more upkeep, while a premium finish may not provide enough practical benefit for your household.
4. Compare Contractor Quotes Properly
Obtain written estimates from qualified contractors who understand the scope of your project. Give each one the same plans, measurements, material expectations, and list of required work where possible.
Review more than the final total. Check whether the estimate includes demolition, disposal, installation, permits, finishing, and cleanup. Ask how changes will be priced and approved.
A proposal that is significantly cheaper than the others may exclude important work or rely on assumptions that have not been discussed. Ask for clarification before making a decision.
Remember: Material prices, labor costs, and project conditions vary by location. Verify any published cost estimates against recent local quotes before using them to set your budget.
Kitchen Layout, Cabinets, Countertops, and Appliances

Once you have defined your scope and budget, compare design choices that affect the kitchen’s function, maintenance, and appearance.
1. Choose Cabinets That Fit Your Storage Needs
Cabinets influence how much you can store and how easily you can reach everyday items. Before selecting a style, decide what needs to fit inside them.
Consider:
- Deep drawers for pots and pans
- Pull-out shelves for items stored at the back
- Vertical dividers for baking trays and cutting boards
- Dedicated space for small appliances
- Pantry storage for dry goods
- Waste and recycling compartments
- Corner storage solutions where appropriate
Compare stock, semi-custom, and custom cabinets according to dimensions, finishes, storage options, lead times, and installed cost. Retailers such as IKEA can be a starting point for comparing cabinet and storage systems, but verify the current specifications and installation requirements for the exact products you choose.
Should You Reface or Replace Kitchen Cabinets?
Cabinet refacing generally makes sense when the cabinet boxes are sound, the existing layout works, and you mainly want a different appearance. It may involve replacing or covering visible surfaces and updating doors and drawer fronts.
Replacement is more suitable when cabinet boxes are damaged, the storage arrangement no longer meets your needs, or the renovation requires a new layout. It can also make sense when other major changes mean the existing cabinetry cannot be reused effectively.
Compare the total cost of both options, including preparation, hardware, installation, and any repairs. Do not decide based on appearance alone.
2. Select Countertops for Your Lifestyle

Countertops should suit your cooking habits, cleaning routine, budget, and preferred design.
Quartz: An engineered surface available in many colors and patterns. Maintenance and heat-resistance guidance depend on the specific product, so follow the manufacturer’s instructions.
Granite: A natural stone with variation in color and pattern. Sealing needs depend on the stone and its finish.
Laminate: Often a budget-conscious choice with many design options. It may be more vulnerable to heat, cuts, and damage than some stone surfaces.
Solid surface: Can offer a consistent appearance and repair options, depending on the product. Follow the supplier’s guidance for heat, cleaning, and maintenance.
Butcher block: Adds warmth and works well in some kitchen styles. It requires appropriate cleaning and maintenance to protect the wood.
Before ordering, confirm the countertop’s thickness, edge profile, sink cutout, faucet holes, support requirements, and any seams. Coordinate the template and installation schedule with cabinet installation and appliance dimensions.
3. Choose Flooring for Durability and Maintenance
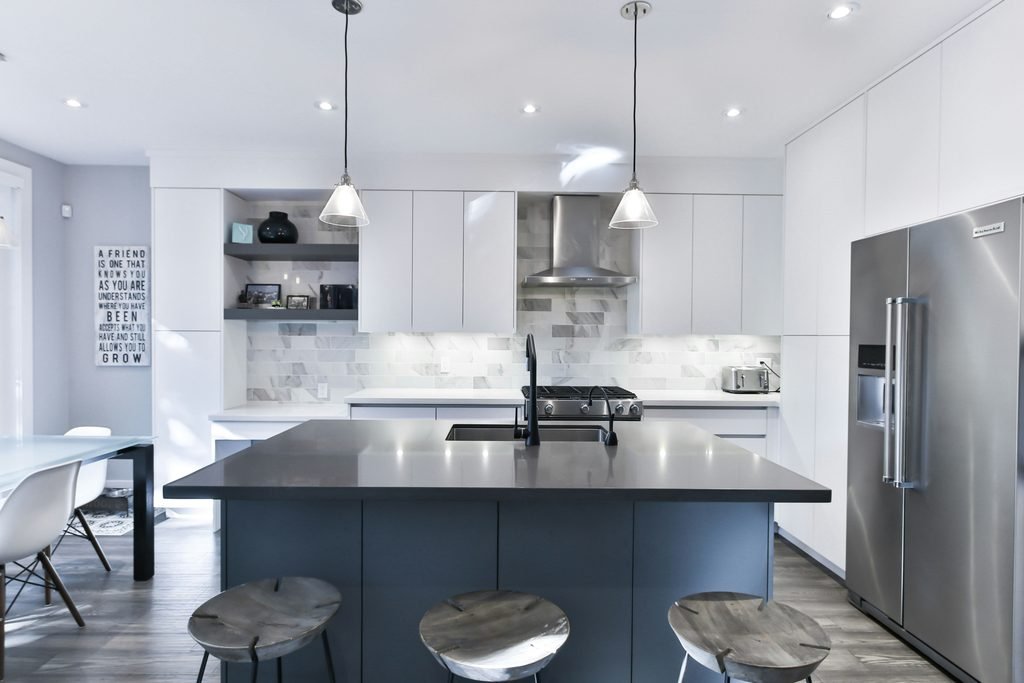
Kitchen flooring should handle foot traffic, spills, cleaning, and the conditions in your home.
Porcelain or ceramic tile can provide a durable surface, but grout requires care and the floor may feel hard underfoot. Luxury vinyl can offer a range of styles and may be comfortable to stand on, but product suitability depends on the subfloor and installation conditions. Hardwood provides a warm appearance but needs appropriate protection from moisture and standing water.
Ask the installer how the chosen floor handles water, what underlayment is required, and how the new floor will meet adjacent rooms. If cabinets and appliances are being replaced, decide the flooring sequence before work begins.
4. Select Appliances Before Finalizing Cabinet Details
Appliance choices affect cabinet openings, electrical requirements, ventilation, clearances, and sometimes plumbing. Confirm exact model dimensions and installation specifications before cabinetry is finalized.
Check:
- Refrigerator width, depth, height, and door swing
- Range or cooktop dimensions and required clearances
- Dishwasher opening and connection requirements
- Range hood type and ventilation route
- Electrical supply or fuel connection
- Water and drainage requirements where applicable
- Delivery access and installation requirements
Do not rely on a product’s headline dimensions alone. Handles, doors, ventilation space, and installation clearances can affect whether an appliance fits.
KitchenAid is one example of an appliance brand homeowners may compare. Evaluate models based on their dimensions, functions, service support, energy use, and total cost rather than brand name alone.
For eligible products, ENERGY STAR’s electric cooking product guidance can help you understand certified efficiency information. Confirm the current label and specifications for the exact appliance before purchasing.
5. Plan Lighting, Outlets, and Ventilation
A well-planned kitchen needs more than attractive ceiling lights. Consider three lighting layers:
- Ambient lighting: General illumination for the whole room.
- Task lighting: Focused light over countertops, the sink, and cooking areas.
- Accent lighting: Optional lighting that highlights shelves, cabinets, or design details.
Discuss outlet placement, circuits, switches, and appliance connections with the appropriate professional. Requirements depend on local codes and the equipment being installed.
Ventilation deserves attention early in the design process. Check the cooking appliance’s requirements and how a hood or other ventilation system will exhaust air. The correct solution depends on the appliance, building configuration, and local rules.
Contractors, Permits, and the Kitchen Renovation Timeline
A realistic renovation plan coordinates design decisions, product deliveries, inspections, and the people performing the work. Finalizing major choices before demolition can reduce avoidable changes during construction.
1. Know When You Need a Permit
Permit requirements vary by city, county, state, and project scope. Cosmetic work may be treated differently from changes to plumbing, electrical systems, gas lines, structural elements, or ventilation.
Before work begins, contact your local building department to confirm which permits and inspections apply. Ask who is responsible for obtaining them and arranging inspections.
Do not assume a contractor’s quote includes permits unless the agreement says so. Keep copies of approvals and inspection records with your project documents.
2. Hire a Qualified Kitchen Renovation Contractor
Choose a contractor based on relevant experience, clear communication, appropriate credentials, and a detailed written agreement—not price alone.
Before signing, ask:
- Have you completed projects with a similar scope?
- Can you provide recent references?
- Are you licensed or registered where required?
- Do you carry the required insurance?
- Who will supervise the project each day?
- Which subcontractors will handle plumbing and electrical work?
- Who obtains permits and schedules inspections?
- How are unexpected repairs and change orders handled?
- What is included in cleanup and debris removal?
- What payment schedule and warranty terms apply?
Check references and confirm applicable licensing and insurance independently. Requirements differ by location and type of work.
Your written agreement should define the scope, materials or allowances, payment milestones, expected schedule, change-order process, cleanup responsibilities, and how disputes or delays will be handled. Avoid relying on verbal promises for important decisions.
3. Understand the Usual Construction Sequence
Every project is different, but a kitchen renovation often follows this general order:
- Planning and design: Confirm scope, layout, measurements, budget, and material selections.
- Permits and ordering: Secure required approvals and coordinate product orders and deliveries.
- Site preparation: Protect nearby areas, set up a temporary kitchen, and disconnect utilities safely.
- Demolition: Remove the items identified in the agreed scope.
- Repairs and rough-in work: Address hidden issues and complete approved structural, plumbing, electrical, or ventilation changes.
- Inspections: Complete required inspections before covering work where local rules require them.
- Walls, flooring, and cabinets: Complete the necessary surface preparation and install components in the sequence agreed with the trades.
- Countertops and backsplash: Template and install countertops, then coordinate backsplash work according to the material and installer.
- Appliances, fixtures, and lighting: Install and connect equipment, fixtures, and finishing details.
- Final checks: Test installed equipment, correct defects, complete cleanup, and collect documentation.
The exact order can change. For example, flooring may be installed before or after cabinets depending on the floor type, cabinet design, appliance requirements, and contractor’s plan. Confirm the sequence before work starts.
4. Build a Realistic Renovation Timeline
A reliable schedule should account for more than the days spent physically working in the kitchen. Design approvals, material production, delivery, permits, inspections, and contractor availability can all affect the start and finish dates.
Ask your contractor to identify key milestones, including:
- Design and material approval
- Permit submission and approval
- Cabinet and countertop ordering
- Demolition and repair work
- Rough-in work and inspections
- Cabinet and surface installation
- Appliance installation
- Final inspection and defect corrections
Ask which activities depend on earlier work and which can happen in parallel. Confirm delivery dates with suppliers and leave room for delays where possible.
Avoid treating a general online timeline as a promise. A simple cosmetic update may be completed much faster than a renovation involving custom cabinets, relocated utilities, structural changes, or several inspections.
5. Prepare for Delays and Change Orders

Some issues only become visible after demolition. Others happen when products arrive late, measurements are incorrect, or a design decision changes after installation has started.
Reduce the risk by confirming dimensions, approving drawings, selecting major materials, and documenting responsibilities before construction. If an unexpected problem arises, ask for a written explanation of the options, cost impact, and schedule impact.
Do not authorize extra work based only on a casual conversation. Record the change and get approval through the process stated in your contract.
Preparing Your Home and Avoiding Common Mistakes
Even a well-designed renovation affects everyday routines. Preparation can make the work easier for your household and help protect the rest of your home.
1. Set Up a Temporary Kitchen
If your main kitchen will be unavailable, choose a temporary area for basic food preparation. Depending on the space and your needs, you might use a microwave, electric kettle, refrigerator, or other suitable small appliance.
Make sure any temporary setup follows the appliance manufacturer’s safety instructions and does not overload electrical circuits. Never use outdoor cooking equipment or fuel-burning appliances indoors unless the equipment is specifically designed and approved for that use.
Keep everyday dishes, utensils, food, and cleaning supplies together in an accessible location. Plan simple meals and consider how you will wash dishes and manage food waste.
2. Protect Your Household From Dust and Disruption
Discuss dust containment, ventilation, work hours, site access, and cleanup with your contractor before demolition. Keep children and pets away from the work zone and secure tools, debris, and materials.
The U.S. Environmental Protection Agency’s remodeling guidance recommends practical steps to reduce dust and pollutants, including containing the work area and providing appropriate ventilation.
If your home was built before 1978, lead-based paint may be present. Renovation work that disturbs painted surfaces can require special precautions and qualified professionals. Do not disturb suspected asbestos-containing materials; seek appropriate professional advice before proceeding.
3. Avoid These Common Kitchen Renovation Mistakes
Ordering products before checking dimensions: A refrigerator, range, or dishwasher that does not fit can cause expensive delays. Verify the exact specifications and openings before ordering.
Changing the layout without reviewing the implications: Moving a sink, cooktop, or major appliance can affect plumbing, electrical work, ventilation, and cost. Confirm feasibility before committing to the design.
Choosing appearance over function: Open shelves or oversized islands may look appealing but can create storage or circulation problems if they do not suit your household.
Ignoring material maintenance: Compare cleaning instructions, durability, repair options, and expected upkeep before selecting countertops and flooring.
Accepting unclear estimates: If exclusions, allowances, and change-order costs are not explained, comparing bids becomes difficult. Request written clarification.
Skipping permit checks: Local requirements can apply to work beyond visible finishes. Confirm them with the relevant building department before construction.
Making major decisions during demolition: Late changes can affect orders, trade schedules, and the overall budget. Finalize as much as practical before work begins.
Kitchen Renovation Checklist
- List the kitchen’s functional problems and renovation priorities.
- Decide whether the project is cosmetic, partial, or a full renovation.
- Measure the room and confirm the layout with the appropriate professional.
- Establish a budget, compare written estimates, and set aside a contingency.
- Choose cabinets, countertops, flooring, lighting, and appliances.
- Verify product dimensions, installation requirements, and delivery timing.
- Confirm permit and inspection requirements with the local building department.
- Check contractor qualifications, insurance, references, and contract terms.
- Agree on the construction sequence, schedule, and change-order process.
- Prepare a temporary kitchen and protect the rest of the home.
- Inspect completed work, test equipment, and document outstanding issues.
Frequently Asked Questions
What’s the first thing I should do before a kitchen renovation?
Identify the kitchen’s main problems, establish your priorities, measure the existing space, and set a realistic budget before choosing finishes or ordering products. This gives you a clear starting point for design and contractor discussions.
How do I plan a kitchen renovation budget?
List expected costs for labor, cabinets, countertops, appliances, flooring, lighting, permits, and disposal. Obtain comparable written estimates and reserve money for unexpected issues. Use current local quotes to establish realistic figures.
Should I replace or reface my kitchen cabinets?
Refacing is worth considering when the cabinet boxes remain sound and the layout still works. Replacement is usually more appropriate when cabinets are damaged, storage needs have changed, or the kitchen requires a different configuration. Compare the full cost of each option.
Why does a kitchen renovation take longer than expected?
Delays can result from product lead times, permit inspections, hidden damage, trade scheduling, delivery issues, and changes made after construction begins. Finalizing decisions early and documenting the project schedule can reduce avoidable delays, although not every issue can be predicted.
When should I hire a kitchen renovation contractor?
Contact qualified contractors early, once you have defined the project scope and initial budget. Discuss feasibility before finalizing major design decisions. Before work begins, confirm measurements, responsibilities, estimates, permits, schedule, and the written agreement.
Final thoughts: Plan Your Kitchen Renovation With Confidence
A successful kitchen renovation starts with a clear plan—not a shopping list of finishes. Identify the problems you need to solve, build a budget around your actual project, and confirm the layout before ordering cabinets or appliances.
Take time to compare materials, review contractor proposals, check local permit requirements, and agree on the construction sequence. These steps help you make better decisions and reduce avoidable surprises.
Use the checklist in this guide to organize your next steps. If your project involves structural changes, complex electrical or plumbing work, or uncertain building conditions, consult appropriately qualified professionals before proceeding.